Western Digital Red NAS drives generate warnings alerts after 3 years, even without problem | ACE Data Recovery Article
Concerns over WD Drives in Synology NAS Devices
The ongoing issues with WD drives installed in Synology NAS devices have raised concerns among users about the reliability and longevity of these drives. Some users have reported cases of the "replace me!" warnings appearing on drives that are well within their expected lifespan and without any noticeable hardware faults. This has led to accusations that Western Digital is using its analytics software, WDDA, to coerce customers into purchasing new hard drives prematurely.
The frustration among users is further exacerbated by the fact that the flagged drives cannot be utilized for repair or storage expansion within the NAS system. This limitation forces users to either replace the drive, even if it is functioning perfectly, or disable the drive's analytic system, potentially sacrificing the ability to receive valid alerts in the future. The recommended course of action, urging users to replace the drive due to accumulated power-on hours, seems arbitrary and does not account for the overall health or performance of the drive.
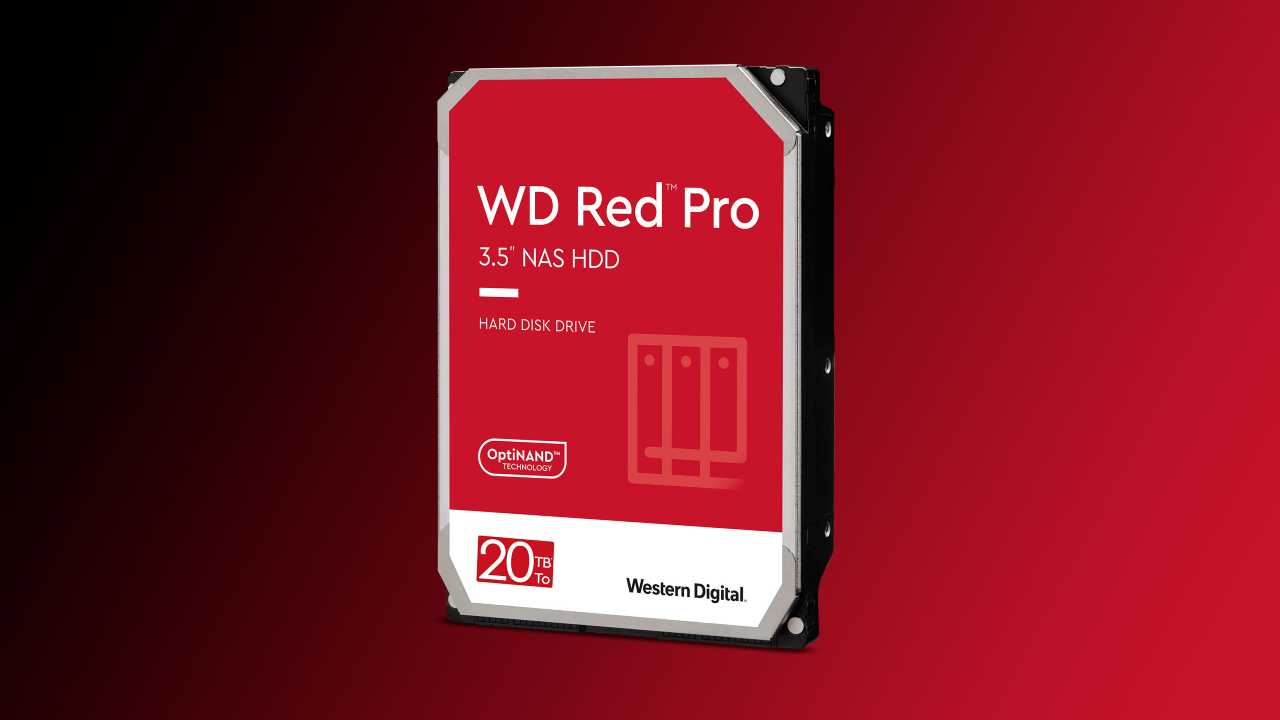
Adding to the confusion, Western Digital has not released a comprehensive list of devices utilizing WDDA, making it difficult for users to determine if their specific drives are affected. On the other hand, Synology has provided a partial list of affected drives, including WD Red Pro, WD Red Plus, and WD Purple models. It is worth noting that these drives are primarily advertised for surveillance use, rather than NAS applications, which raises questions about their compatibility and reliability in a NAS environment.
Synology Caught in the Middle
Synology, as the manufacturer of the NAS devices, finds itself caught in the middle of this situation. They designed their software, DiskStation Manager (DSM), to work in conjunction with Western Digital's warning system, expecting it to accurately report genuine hardware errors. Unfortunately, it appears that the WDDA software may be generating false warnings, creating a frustrating experience for Synology users.
To address the issue, Synology advises affected users to disable the WDDA system through the Storage Manager in order to remove the warning and restore full functionality for repairs and storage expansion. While Synology believes that disabling WDDA poses no risk, users are encouraged to closely monitor their systems for any signs of deteriorating drive health, such as significantly slower read/write speeds or other warnings.
Additional Setbacks for Western Digital
In recent times, Western Digital has faced additional setbacks that have further eroded customer trust. Users of SanDisk portable SSDs experienced sudden failures, prompting Western Digital to issue a fix for some affected models. Furthermore, earlier this year, Western Digital My Cloud users faced data access issues due to a security breach, which raised concerns about data privacy and system vulnerabilities.
Overall, the situation involving WD drives and Synology NAS devices highlights the importance of transparency, reliability, and proper communication from hardware manufacturers. Users deserve clear explanations, accurate warnings, and dependable products to ensure the longevity and security of their data storage systems.
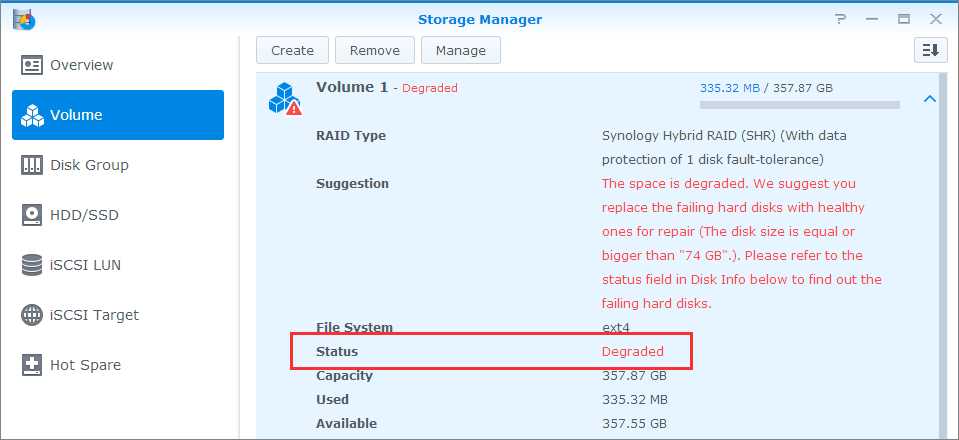
Synology NAS RAID Failure at the Time of Rebuilding
If you have a Synology NAS with a RAID array, you may encounter a situation where one or more of your drives actually fails (not a false WD warning!) and needs to be replaced. In this case, you will need to repair the storage pool by replacing the defective drives with healthy ones and resyncing the RAID array. However, what happens if you have a good WD Red drive as a replacement, but it is also three years old? This process can become risky and time-consuming, especially if you have a large amount of data or a complex RAID configuration.
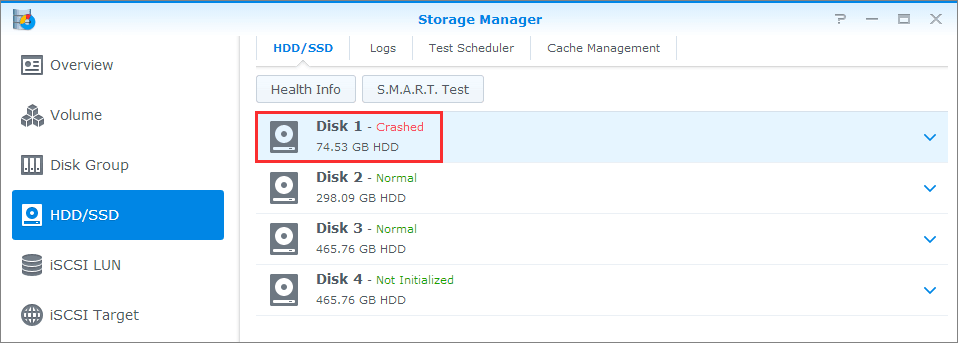
One of the risks involved in repairing a RAID array is that another drive may fail during the rebuild process. This can happen due to various factors such as mechanical wear and tear, physical damage, power surges, overheating, or HDD bad sectors failure. It is therefore important to regularly monitor the status and health of your drives and replace them as soon as possible if they show signs of failure.
Another risk is that the rebuild process may take a long time to complete, depending on the size and type of your drives, the RAID level, and the amount of data. During this time, your NAS performance may be degraded, and your data may be vulnerable to further failures or errors. It is advisable to avoid using your NAS for intensive tasks or accessing large files while the rebuild is in progress.
Steps to Minimize Risks and Ensure Successful RAID Repair
To minimize these risks and ensure a successful Synology RAID repair, it is recommended to follow these steps:
- Back up your important data: Before initiating the repair, back up your important data to another device or location. This will help you recover your data in case something goes wrong during the rebuild process.
- Check compatibility and requirements: Check the compatibility and requirements of your replacement drives. They should match or exceed the size and specifications of the defective drives. For example, if you have a RAID 6 storage pool with 8x2TB drives and one of them fails, you should replace it with a drive that is at least 2TB in size.
- Replace the defective drives: Replace the defective drives with healthy ones. Make sure to power off your NAS completely before removing or inserting any drives. Refer to your NAS manual for specific instructions on how to do this safely.
- Initiate the repair process: Initiate the repair process from the Storage Manager in DSM. Select your storage pool and click on Repair. The system will automatically detect the new drives and start resyncing the RAID array. However, it is important to consider whether DSM will recognize the WD Red drive as a good drive, even if it has been unused and stored on the shelf for three or more years.
- Monitor the progress: Monitor the progress and status of the repair from the Storage Manager. You can also check the read and write speeds and estimated time remaining from the Resource Monitor. The repair process may take several hours or days to complete, depending on various factors.
- Verify storage pool health: Once the repair is completed, verify that your storage pool is healthy and that your data is intact. You can also run a data scrubbing task to check for any inconsistencies or errors in your RAID array. However, it is essential to ensure whether the storage pool can be classified as healthy with the WD Red drives.
If your RAID rebuild fails for any reason, it is recommended to contact professional data recovery services for assistance.